Okta SAML setup guide»
This guide walks you through setting up SAML 2.0 Single Sign-On between Okta and Spacelift, including how to pass group membership so you can use it for permissions in Spacelift.
Warning
Before setting up SSO, create backup credentials for your Spacelift account in case of SSO misconfiguration or other break-glass procedures.
Prerequisites»
- Spacelift account with
adminpermissions - Okta account with permission to create Okta App Integrations
Step 1. Open Spacelift SSO Settings»
- Hover over your name in the bottom-left corner and click Organization settings.
- Navigate to Single Sign-On in the Authentication section.
- In the SAML section, click Set up.
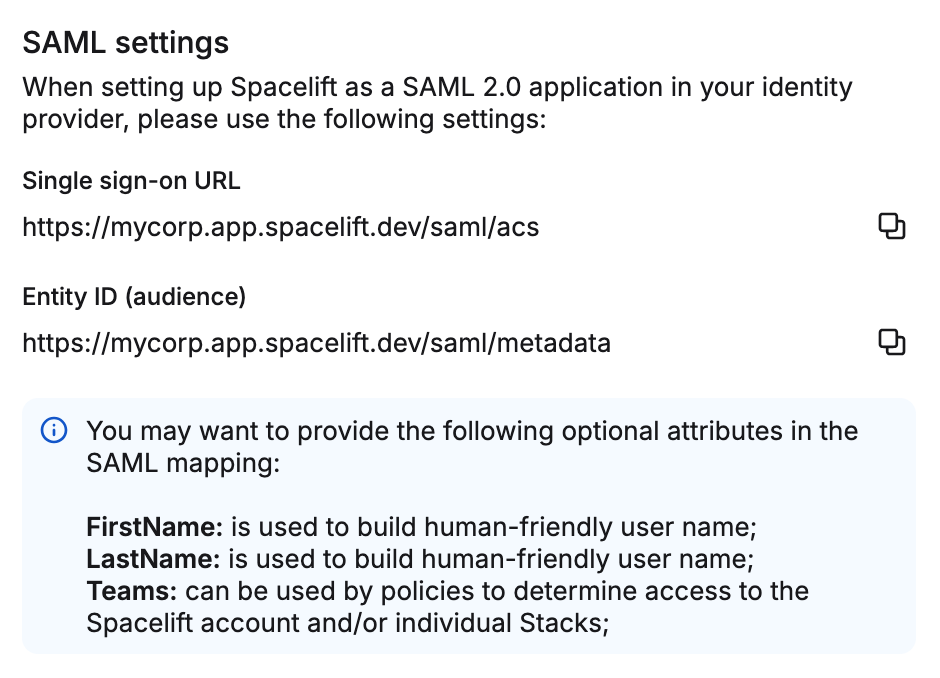
- Keep the drawer open so you can reference the
Single sign-on URLandEntity ID (audience)values for your account.
Step 2. Create the Okta App Integration»
- In a new tab, open your Okta account, navigate to Applications, then click Create App Integration.
- For sign-in method, select SAML 2.0, then click Next.
- Enter a name for your app integration (e.g. "Spacelift"), then click Next.
- Configure SAML details using the values from the Spacelift drawer:
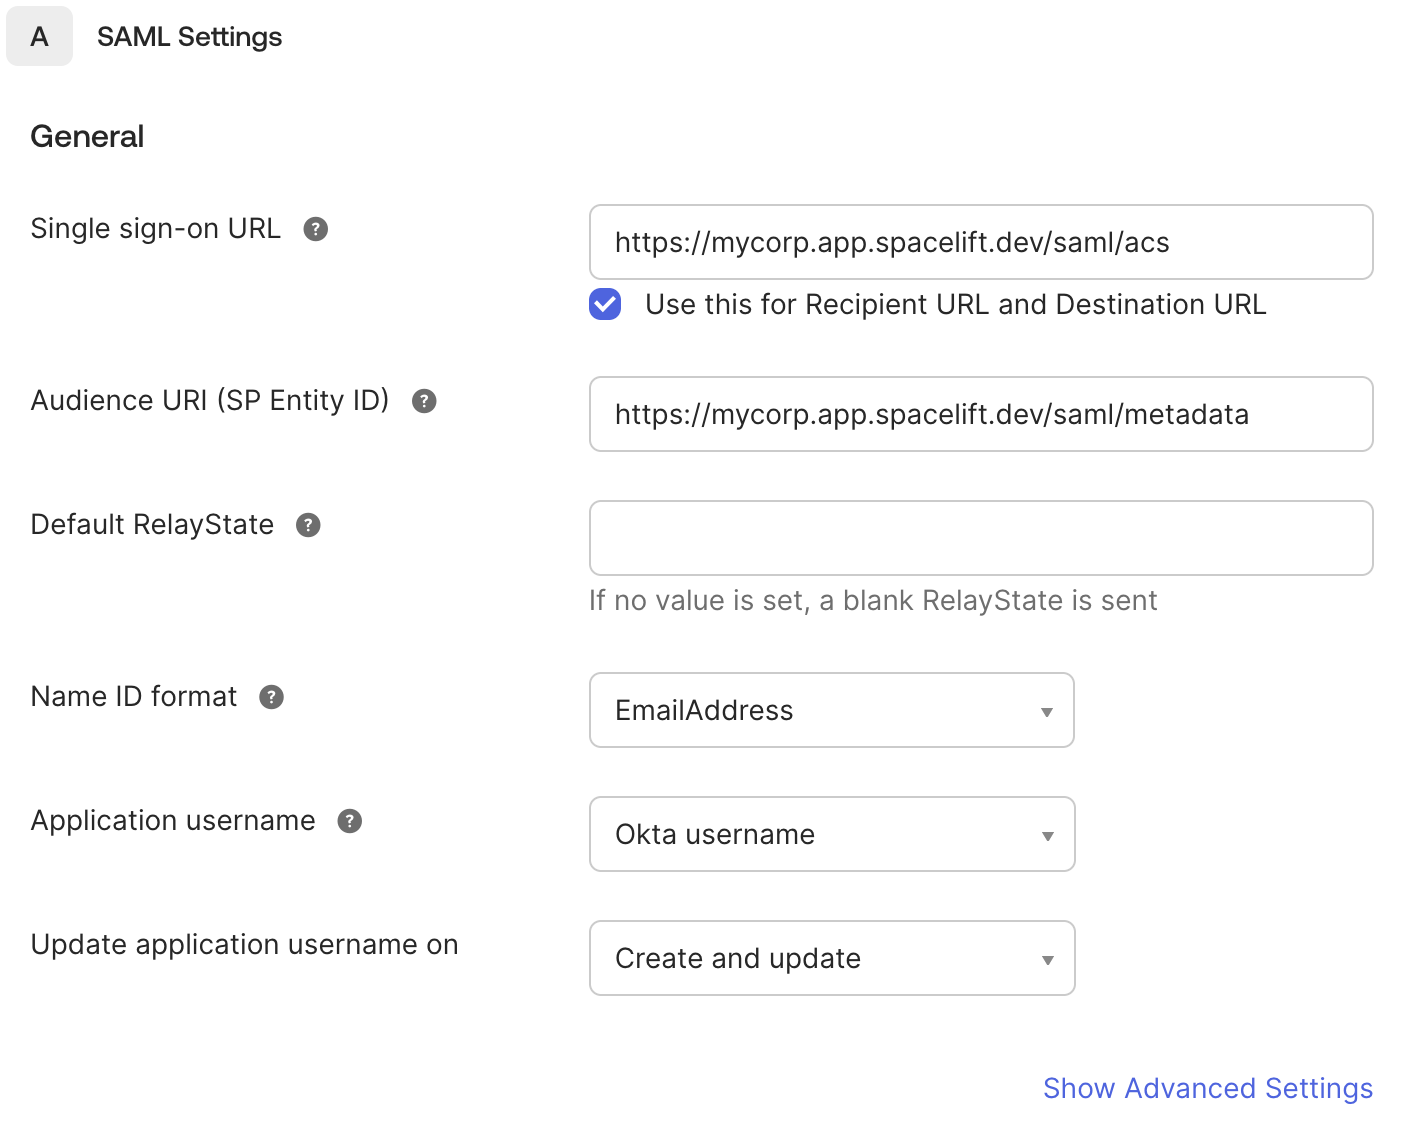
- Single Sign-On URL: Paste the
Single sign-on URLfrom Spacelift (e.g.https://<account>.app.spacelift.io/saml/acs) and check the Use this for Recipient URL and Destination URL checkbox. - Audience URI (SP Entity ID): Paste the
Entity ID (audience)from Spacelift (e.g.https://<account>.app.spacelift.io/saml/metadata). - Name ID format: EmailAddress is a good default. Transient and Persistent are also supported.
- Single Sign-On URL: Paste the
- Finish the configuration wizard.
US regional URLs
If your account is in the US region, your URLs should be https://<account>.app.us.spacelift.io/saml/acs and https://<account>.app.us.spacelift.io/saml/metadata.
Step 3. Configure Spacelift with Okta metadata»
After completing the Okta wizard, you'll be presented with the app's Metadata URL, which looks like https://<org>.okta.com/app/<app-id>/sso/saml/metadata.
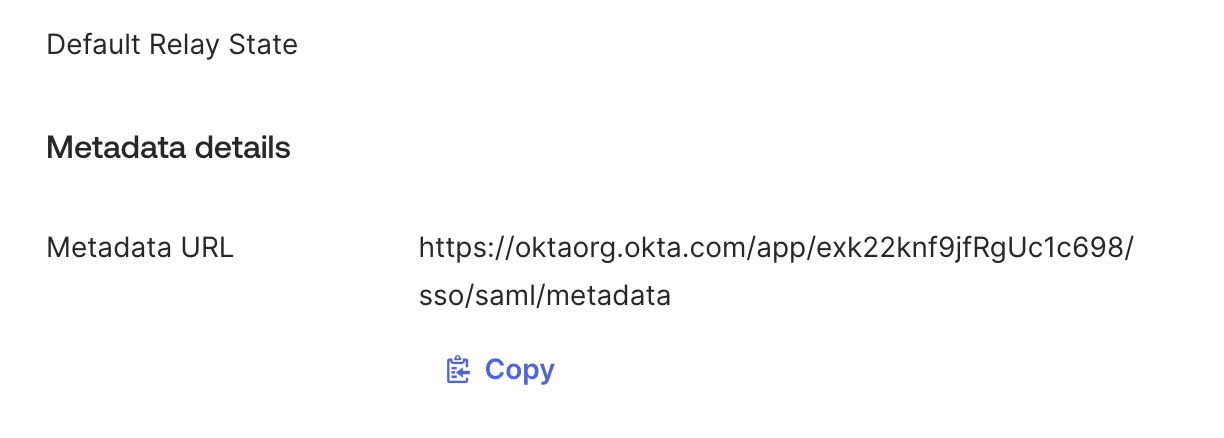
You will need to input this metadata into Spacelift.
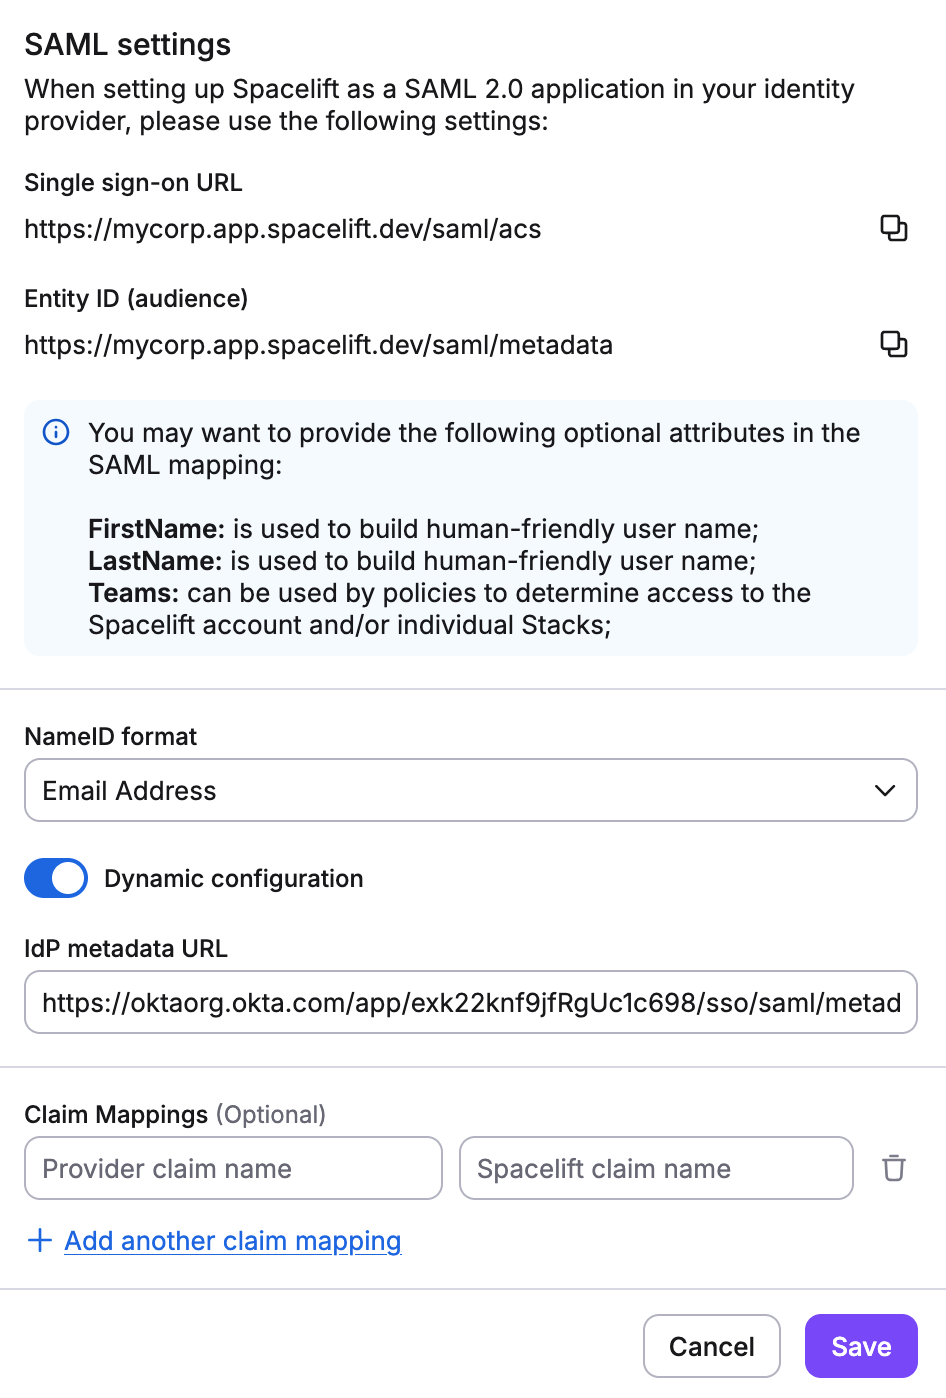
- In the Spacelift UI's SAML setup drawer, enable Dynamic configuration.
- Paste the Metadata URL from Okta into the IdP metadata URL field.
- Click Save.
Step 4. Configure group attribute statements»
Do not skip this step. Without a SAML group attribute statement, Spacelift has no way to know which teams a user belongs to at login, and all group-based permissions will silently fail.
Group membership has to flow through on the SAML assertion at login time. Otherwise input.session.teams in login policies will be empty and IdP group mappings won't match against the user's session. Assigning users to the Okta app, or pushing groups via SCIM, is not enough on its own.
- In the Okta UI, open the Okta application you just created.
- Navigate to the Sign On tab.
- Scroll down to the Attribute statements section and find Group attribute statements (it may be under "Show legacy configuration").
- Add a group attribute statement with the following values:
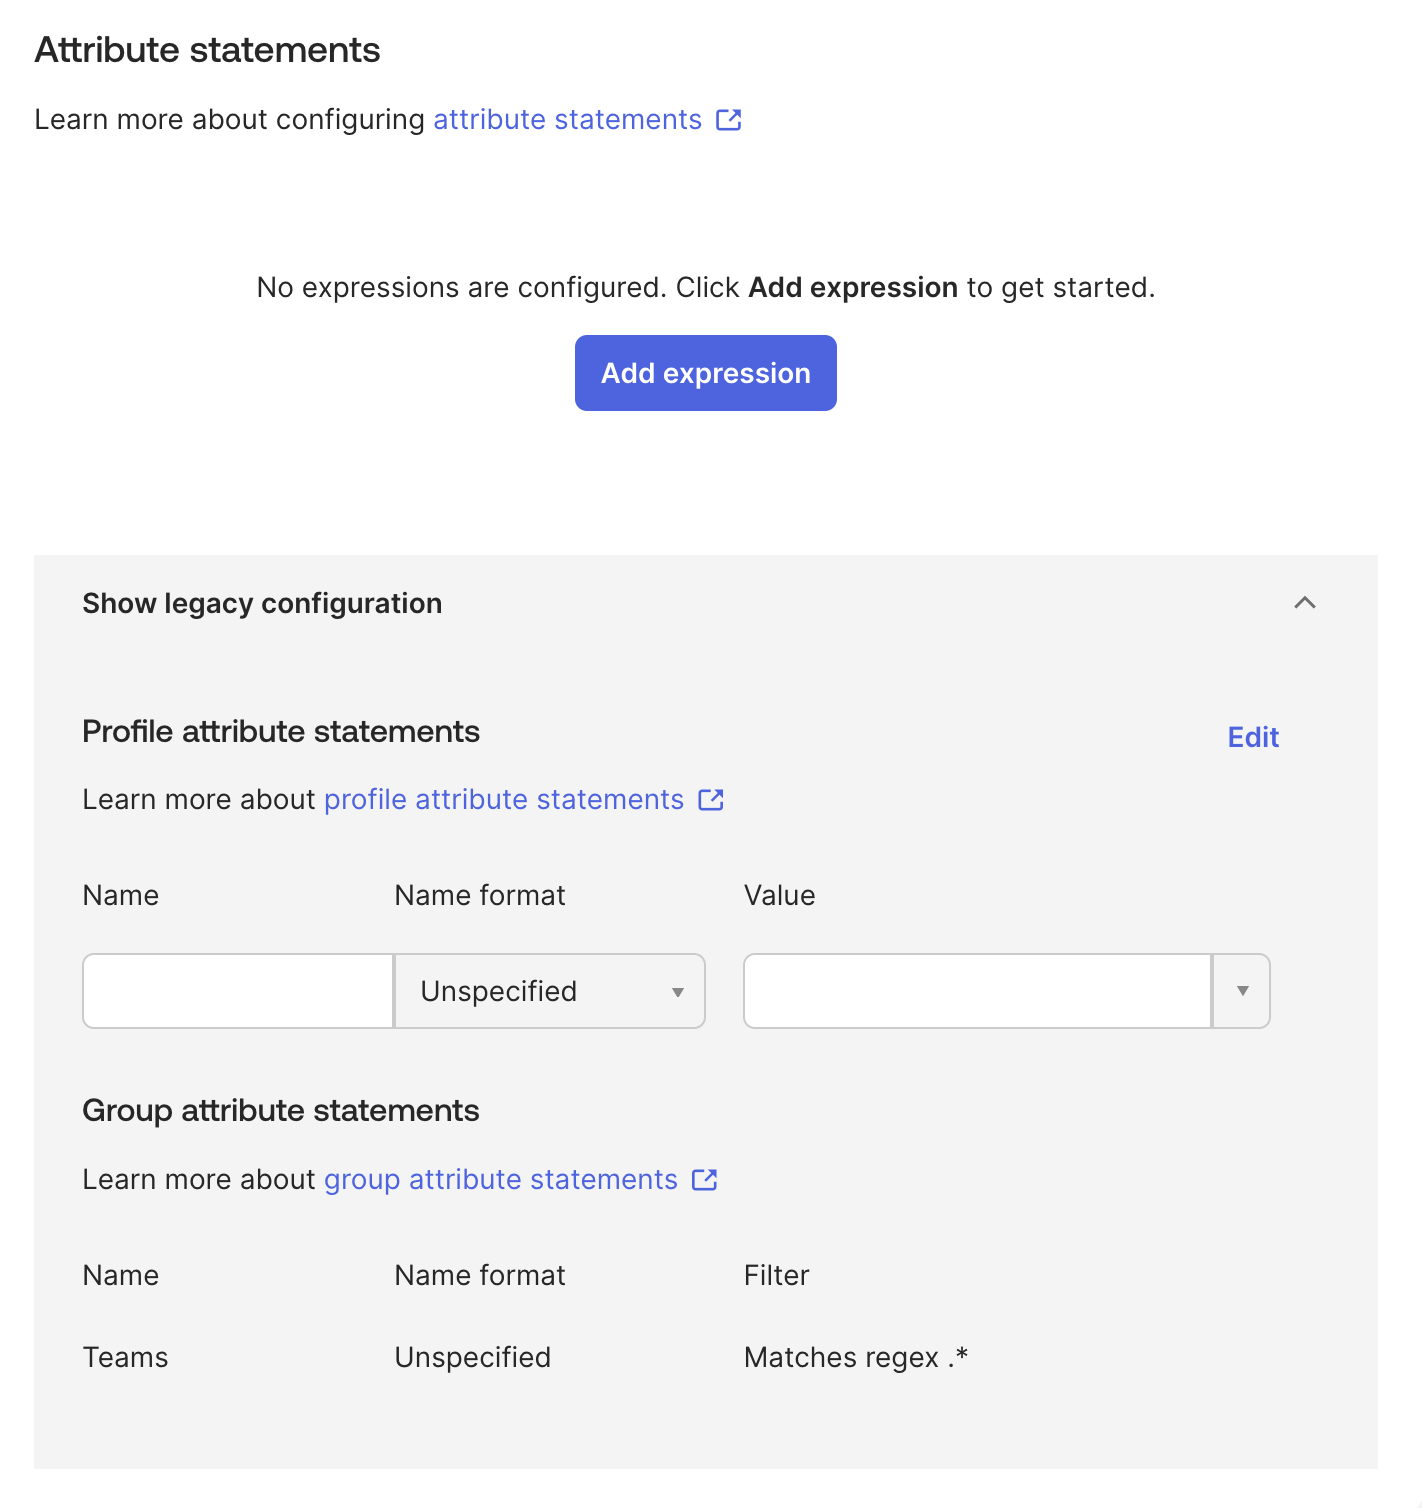
- Name:
Teams(case-sensitive) - Name format: Unspecified
- Filter: Matches regex
.*. This filter sends all group memberships. You can use a more specific filter to limit which groups are sent to Spacelift, for example^Spacelift-.*to only send groups whose names start with "Spacelift-".
- Name:
- Click Next, then Finish to save.
The attribute name must be exactly Teams
Spacelift reads the Teams SAML attribute (case-sensitive) to populate group membership in user sessions. If this attribute is missing or named differently, input.session.teams in login policies will be empty and IdP group mappings won't match any groups.
If your Okta configuration uses a different attribute name (e.g., Groups), you can use the Custom Attribute Mapping feature to map it to Teams on the Spacelift side.
Using group permissions in Spacelift»
Once the Teams attribute is configured, the Okta groups each user belongs to will be available in Spacelift. How you use them depends on your management strategy:
- Identity Access Management: Map Okta groups to roles in specific spaces through IdP group mappings. Anyone assigned to those groups in Okta will automatically get the corresponding permissions in Spacelift.
- Login Policies: Reference groups via
input.session.teamsin your Rego-based login policies to control access and assign roles programmatically.
Info
Users must log out and log back in for group membership changes to take effect in their Spacelift session.
Okta SAML setup completed»
That's it! Your SAML 2.0 integration with Okta should now be fully configured, with group membership flowing through to Spacelift for use in permissions and policies.