Microsoft Azure»
About the integration»
Spacelift provides support for managing Azure resources via the Terraform Azure Provider. The documentation for the Azure Provider outlines the different authentication methods it supports, and it should always be considered the ultimate source of truth.
This page explains how to configure the following authentication methods in Spacelift:
- Spacelift-managed integration: The simplest way to get your cloud integration up and running. Handles automatic secret creation and rotation.
- Static credentials: Useful when using the public worker pool, or workers that are not hosted in Azure. Simple to setup, but requires you to manually manage secret rotation.
- Managed service identities: Ideal when using private workers hosted in Azure. Requires managing your own workers, but secret rotation is handled automatically by Azure.
Tip
This guide explains how to configure the Azure provider using environment variables. Although you can add these environment variables directly to individual stacks, it may be worth creating a Spacelift context to store your Azure credentials. This allows you to easily add the same credentials to any stack that requires them.
Spacelift-managed integration»
See Integrate Spacelift with Microsoft Azure to configure the integration through the Spacelift UI, provide admin consent, and set up proper permissions in Azure.
Auto-attach integrations»
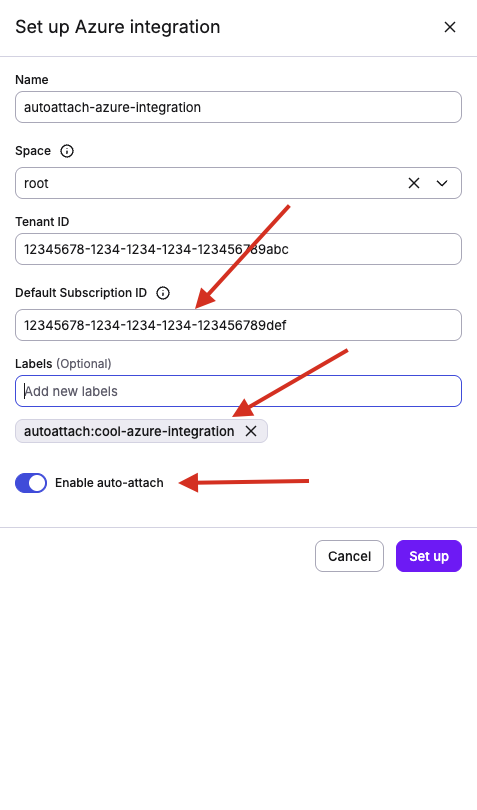
Azure integrations can now be auto-attached to stacks and modules. To do so, include a label in your integration following this format autoattach:<your_label>. Then select the Enable auto-attach toggle and click Set up.
Info
Azure integrations require a Default Subscription ID to be auto-attached. This is the subscription that will be used when auto-attaching the integration.
You will immediately see the stacks and modules that already have your label in the Auto-attached section. To auto-attach your new integration to another stack or module, simply add <your_label> to it and we will attach the integration for you. This follows the same behavior as other auto-attachable resources.
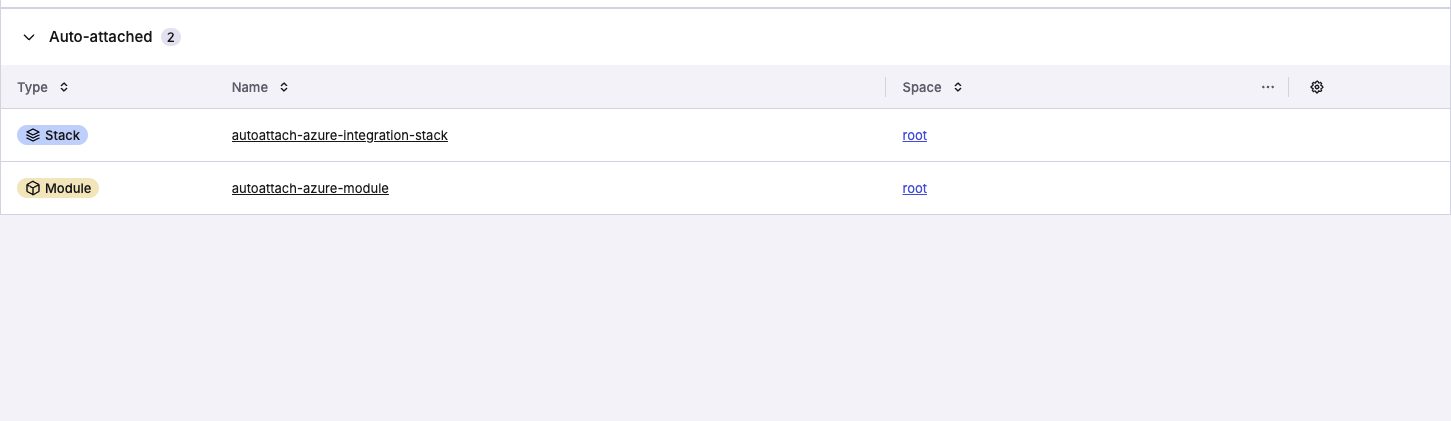
Info
You have to enable auto-attach on each integration individually to prevent clashes with previous labels in your account.
Static credentials»
To use static credentials, you need to create an Azure service principal, grant it access to your Azure subscription, and then configure the Azure Provider to use the service principal via environment variables.
If you already know how to create and manage service principals, feel free to skip to the configure via environment section.
Create a service principal»
Create a service principal using this command, substituting <subscription-id> with your own subscription ID:
1 | |
This will output something like:
1 2 3 4 5 6 7 8 9 10 | |
The command creates a new service principal called spacelift-sp, and grants it the Contributor role on your subscription. It also outputs the appId, password and tenant for the service principal. Make a note of these because you'll need them later.
Info
If you would rather assign permissions separately, you can run the following command to create a Service Principal with no role assignments:
1 | |
Configure via environment»
Azure provides two options for authenticating service principals:
- Client secrets: A randomly generated string.
- Client certificates: An x509 certificate.
Either option can be used depending on your requirements, and the configuration required for both is very similar.
Authenticating with a client secret»
To configure the Azure provider using a client secret, add the following environment variables to your Spacelift stack:
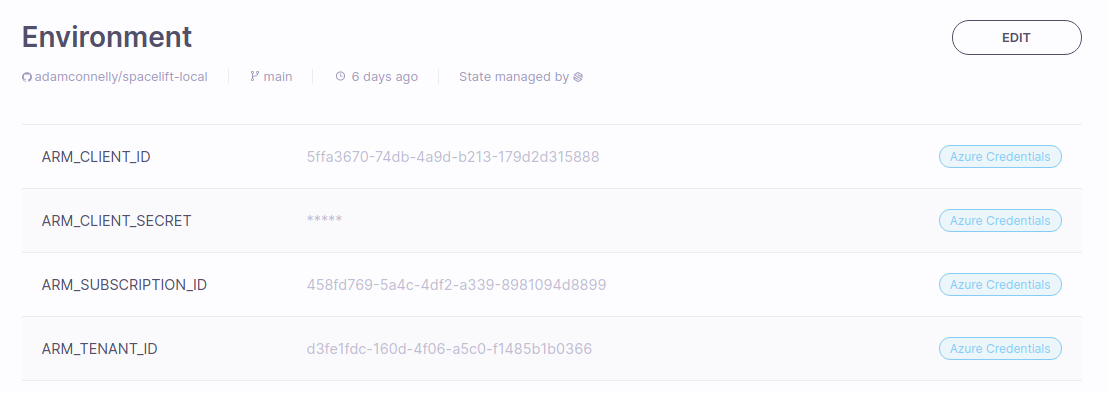
ARM_CLIENT_ID: TheappIdreturned when you created your service principal. This is known as the Application ID or Client ID within Azure.ARM_CLIENT_SECRET: Thepasswordreturned when you created your service principal.ARM_SUBSCRIPTION_ID: Your subscription ID.ARM_TENANT_ID: Thetenantreturned when you created your service principal.
Once finished, your environment should look something like this:
Authenticating with a client certificate»
To configure the Azure provider using a client certificate, first add your PFX as a mounted file to your environment:

Warning
You should treat this certificate like any other credential, and mark it as a secret.
Next, add the following environment variables to your Spacelift stack:
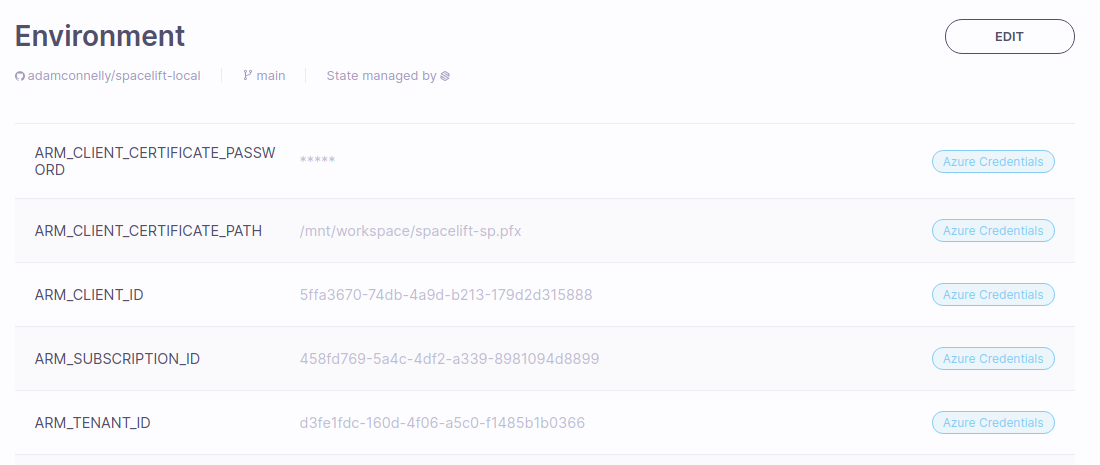
ARM_CLIENT_ID: TheappIdreturned when you created your service principal. This is known as the Application ID or Client ID within Azure.ARM_CLIENT_CERTIFICATE_PATH: The path to the certificate you uploaded in the previous step.ARM_CLIENT_CERTIFICATE_PASSWORD: The password for your certificate.ARM_SUBSCRIPTION_ID: Your subscription ID.ARM_TENANT_ID: Thetenantreturned when you created your service principal.
Once finished, your environment should look something like this:
Credential expiry and rotation»
When using static credentials, you are in charge of managing credential rotation. The client secret returned by the az ad sp create-for-rbac command will expire after one year. At that point, any stacks using that client secret will stop working until a new one is added and the Spacelift environment is updated.
Managed identities»
Azure managed identities assigns an identity to an Azure virtual machine that is then used for role assignment. With managed identities, you can grant your Spacelift private workers permission to manage your Azure resources without having to store any credentials in Spacelift or deal with credential rotation.
To use a managed identity, you need to take the following steps:
- Set up a private worker pool.
- Create an Azure VM with a managed identity, and install the worker binary on it.
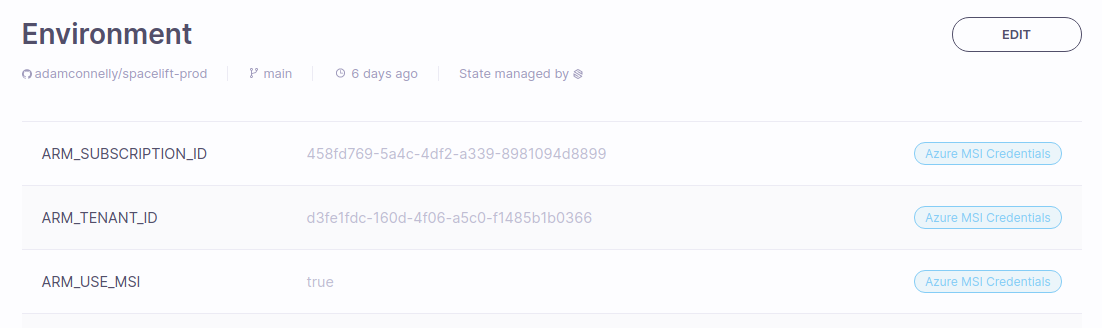
- Configure the Azure provider to use the managed identity for authentication by adding these environment variables to your stack:
ARM_USE_MSI: Set totrueto indicate you want to use a managed identity.ARM_SUBSCRIPTION_ID: Your subscription ID.ARM_TENANT_ID: Your Microsoft Entra tenant.
- If you are using a user-assigned identity, add the following variable to your stack:
ARM_CLIENT_ID: The client ID of your user-assigned identity.
Once finished, your environment should look something like this: