Webhooks»
Info
This feature is only available to paid Spacelift accounts. Please check out our pricing page for more information.
Spacelift can be configured to send webhook notifications for various events to an HTTP endpoint of your choice.
Set up webhooks»
Webhooks can be created or modified by Spacelift administrators in the Webhooks section of the Integrations page.

Fill required fields»
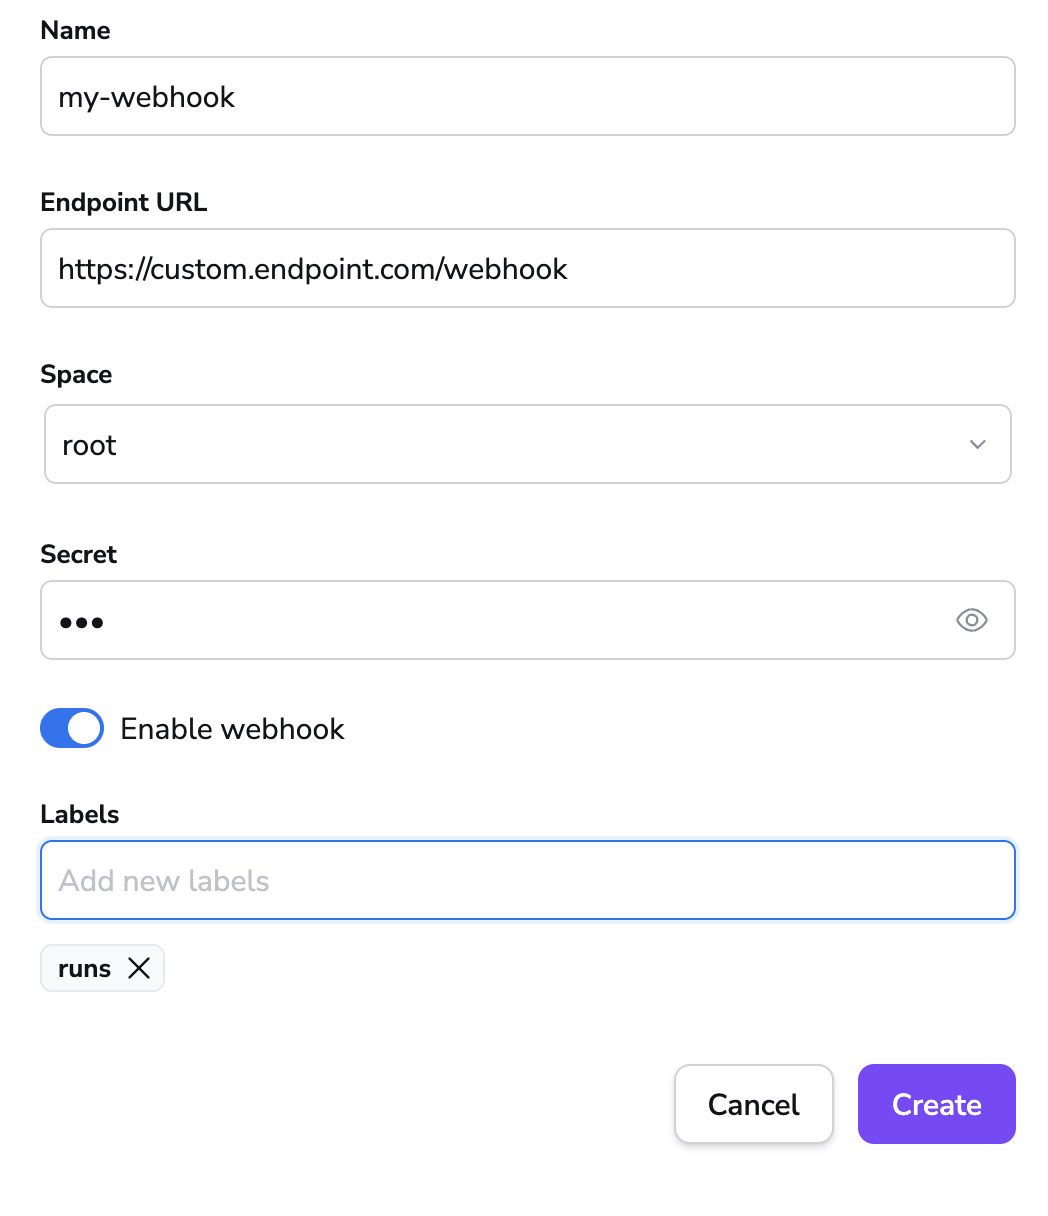
- On the Webhooks section of the Integrations page, click View.
- Click Create webhook.
- Fill in the webhook details:
- Name: Enter a name for the webhook integration.
- Endpoint URL: Enter the endpoint URL the webhook will send information to.
- Space: Select the space that can access the webhook.
- Secret (optional): Enter the secret, if needed, to validate the received payload.
- Enable webhook: Enable or disable the webhook.
- Retry on failure: Enable to automatically retry webhook delivery (up to 3 times) when receiving 5xx HTTP responses.
- Labels (optional): Enter a label or labels to help sort your webhooks if needed.
- Headers: Enable, then enter the Key and Value pair to add to the webhook.
- Click Create.
Info
The webhook secret cannot be modified after the webhook is created. To rotate the secret, delete the webhook and recreate it with a new secret.
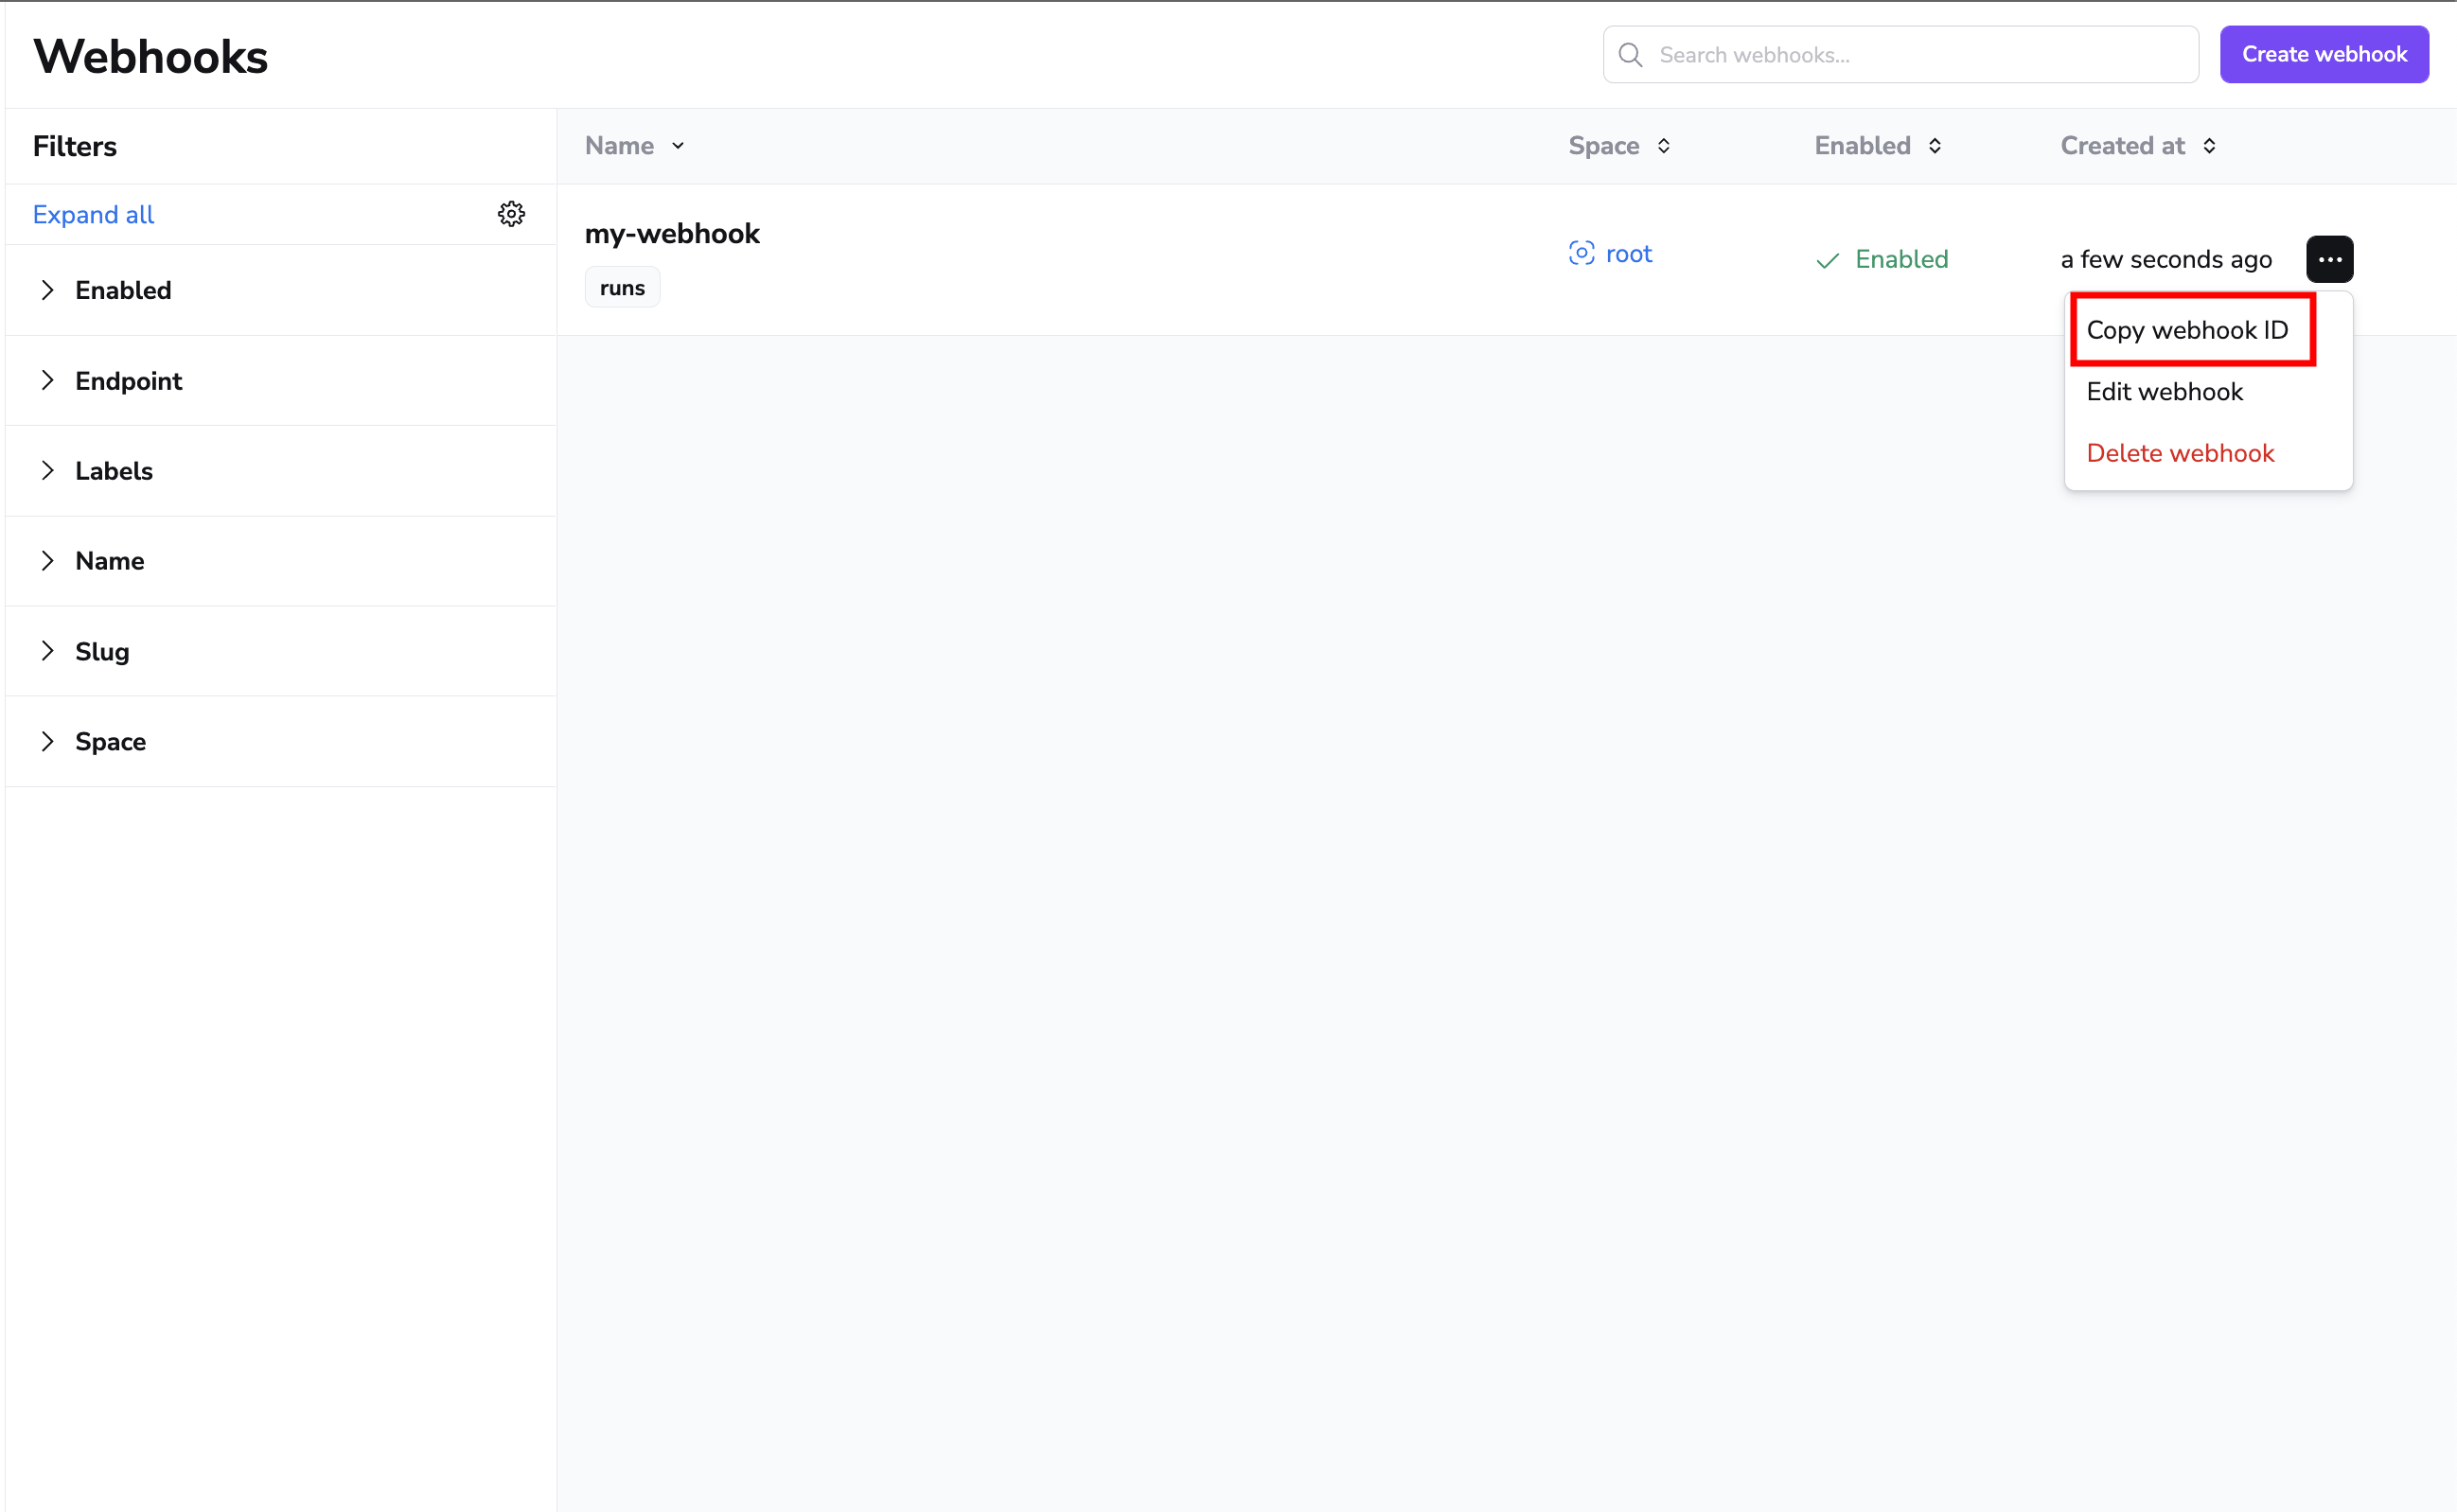
Reference webhooks in policy rules»
Webhook messages are delivered using the notification policy. When defining rules, the policy expects you to reference the webhook by its ID which you can copy from the webhook list view:
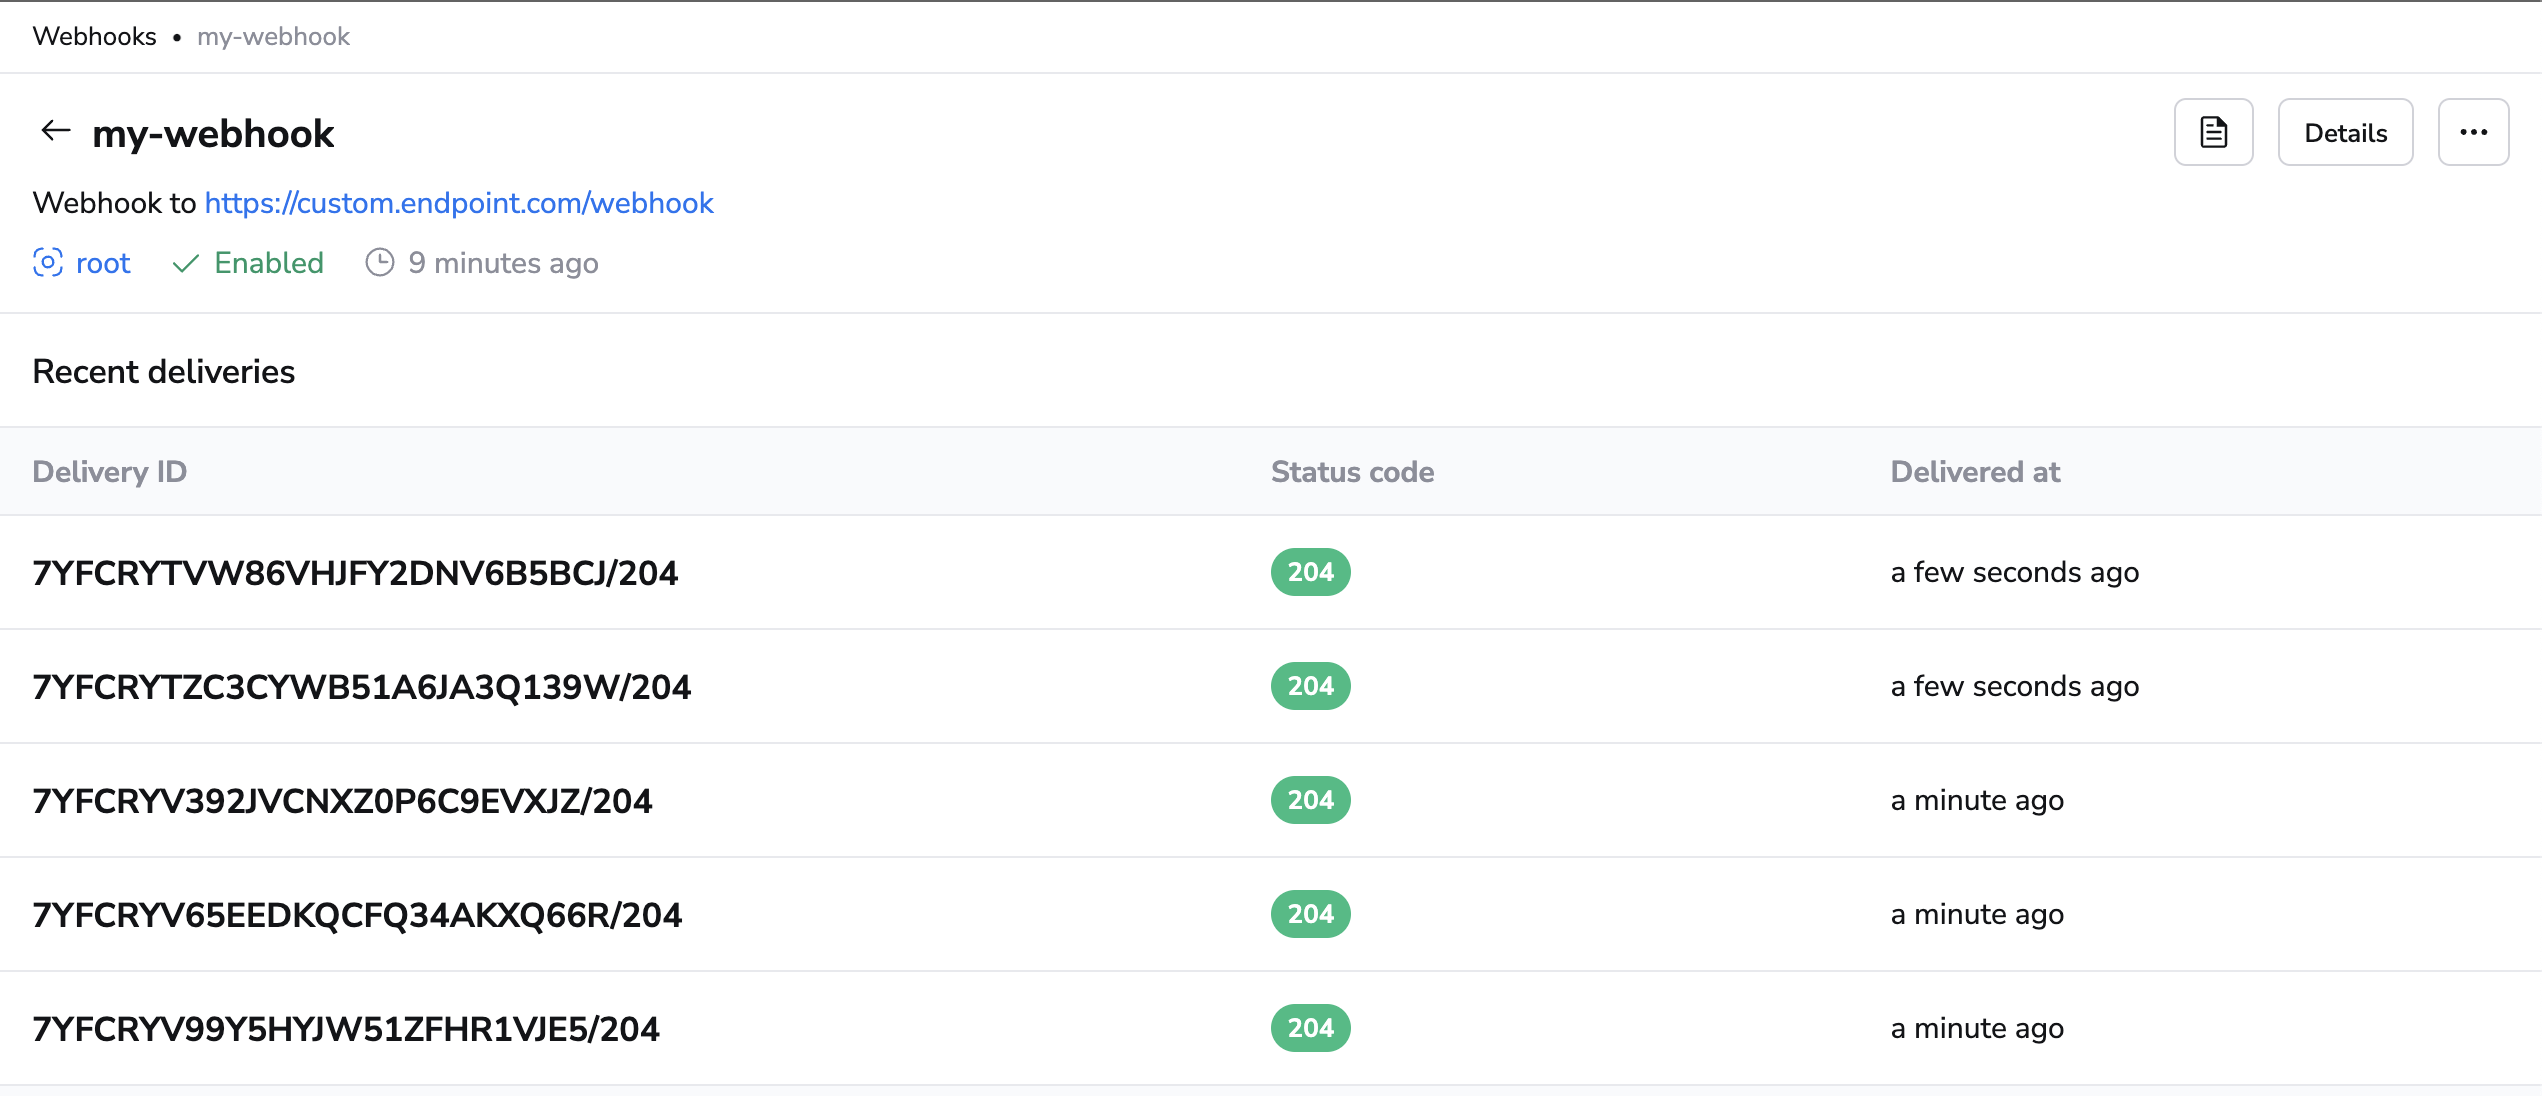
Webhook deliveries»
Webhook deliveries and their response statuses are stored and can be explored by selecting a specific webhook and viewing its details. You'll be presented with a list of deliveries, their status codes and when they happened.
You can also click on each delivery to view more details about it:
Default webhook payloads»
These are the default webhook payloads sent for each event type. If required, webhook payloads can be customized via a notification policy.
Run events»
Here's an example of the default webhook payload for a notification about a finished tracked run:
1 2 3 4 5 6 7 8 9 10 11 12 13 14 15 16 17 18 19 20 21 22 23 24 25 26 27 28 29 30 31 32 33 | |
The payload consists of a few fields:
account: The name (subdomain) of the account generating the webhook. This is useful for pointing webhooks from various accounts at the same endpoint.state: A string representation of the run state at the time of the notification being triggered.stateVersion: The ordinal number of the state, which can be used to ensure that notifications that may be sent or received out-of-order are correctly processed.timestamp: The unix timestamp of the state transition.run: Contains information about the run, its associated commit and delta (if any).stack: Contains some basic information about the parent Stack of therun.
Internal error events»
1 2 3 4 5 6 7 | |
Internal errors will always have the same fields set and some of them will be static for an event:
title: The title (summary) of the error.body: The full explanation of what went wrong.error: A description of the error that occurred.severity: One of three different constants:INFO,WARNING,ERROR.account: The account for which the error happened.
Validate payload»
To validate the incoming payload, you will need the secret you provided when creating the webhook.
The following section provides different instructions for validating the payload depending on whether your Spacelift account is in our FedRAMP environment or not:
Every webhook payload comes with two signature headers generated from the combination of the secret and payload. X-Signature header contains the SHA1 hash of the payload, while X-Signature-256 contains the SHA256 hash. We're using the exact same mechanism as GitHub to generate signatures, please refer to GitHub docs for details.
Only the SHA-256 signature will be used for webhook payload validation. The X-Signature header containing the SHA1 hash will not be provided, ensuring compliance with FIPS requirements that prohibit the use of SHA-1 for cryptographic purposes.
We're using the exact same mechanism as GitHub to generate signatures, please refer to GitHub docs for details.
Spacelift is using the exact same mechanism as GitHub to generate signatures, so you can refer to GitHub's docs for details.
Attach webhooks to stacks»
Warning
We recommend that you use notification policies to route stack events to your webhooks. Stack webhook integrations are provided for backwards compatibility.
Webhooks can be set up by Spacelift administrators on per-stack basis.
- On the Stacks page, click the three dots beside the stack you would like to attach a webhook to.
- Click Settings, then Integrations.
- Click Webhooks.
- Either select an existing webhook or click Create webhook.

Info
You can set up as many webhooks as you need for a Stack, though each one must have a unique endpoint.
Fill in webhook details»

- Endpoint: Enter the endpoint URL the webhook will send information to.
-
Secret (optional): Enter the secret, if needed, to validate the received payload. It is up to you to decide on a non-obvious secret.
Info
The webhook secret cannot be modified after the webhook is created. To rotate the secret, delete the webhook and recreate it with a new secret.
-
Enable webhook: Enable or disable the webhook.
- Retry on failure: Enable to automatically retry webhook delivery (up to 3 times) when receiving 5xx HTTP responses.
Once saved, the webhook will appear on the list of integrations:

Disable existing webhook»
Webhooks are enabled by default, so they are triggered every time there's a run state change event on the stack they are attached to. If you want to temporarily disable some of the endpoints, you can do that without having to delete the whole integration.
- Navigate to the Integrations page and click View in the Webhooks card.
- You can also navigate to the Stacks page, click the three dots beside the stack name, then click Settings > Integrations > Webhooks.
- Click Edit webhook.
- Click the toggle beside Enable webhook. When disabled, the toggle will be gray.

Enable the webhook again by repeating steps 1-3 and clicking the toggle to turn it blue:

Auto-disabled webhooks
Webhooks in Spacelift are automatically disabled after 10 or more consecutive failures. This is a built-in protection mechanism to prevent continuous failed attempts.
Spacelift sends a notification to your account when a webhook is auto-disabled. To re-enable the webhook, resolve the underlying issue that caused the failures, and then manually re-enable it.